Short answer. Before you deploy anything to a fresh VPS, do eight things: verify the resources and virtualization type, create a non-root user with sudo, move your SSH key over and disable password logins, enable a firewall and fail2ban, apply updates and turn on automatic security patching, set hostname, timezone and NTP, and add swap plus file-descriptor limits. The web stack, TLS certificate, backups and monitoring come immediately after — not "later".
Why the first 30 minutes matter more than any later tuning
A freshly provisioned VPS is a machine with a public IP, an open SSH port and, usually, a root password that arrived by email. Scanners find hosts like that within minutes: a typical server starts collecting SSH brute-force attempts before you have even picked a project name. What you do in the first half hour decides whether the box runs for years or becomes someone else's crypto miner in week two.
The second reason is the cost of change. Swapping the distribution, the partition layout, the service account or the backup scheme is trivial on an empty server and painful once production traffic, a database and mail are running on it. The order below follows that logic: irreversible and foundational decisions first, everything else after.
Rule: never deploy a project onto a server that has no firewall, no automatic security updates and no backups yet. A site that is "just a test" gets indexed, scanned and compromised exactly like production.

Step 0. Which OS to choose for a server, and why not the newest one
For a web server, pick an LTS branch: Ubuntu Server LTS or Debian stable. The reason is predictability. LTS releases receive security updates for years without bumping major versions of system libraries, so a routine update will not break your stack. Ubuntu LTS ships every two years with roughly five years of standard support; Debian stable lives about three years plus a community-driven LTS extension.
An interim (non-LTS) release is a poor production choice: support lasts months, after which you are forced into a full distribution upgrade on a live server. A newer nginx or PHP version is a problem solved by adding the vendor's official repository, not by changing the operating system.
| Criterion | Ubuntu Server LTS | Debian stable | Interim release |
|---|---|---|---|
| Support window | Years, fixed | Years, fixed | Months |
| Package freshness | Moderate | Conservative | High |
| Availability of guides | Maximum | Plenty | Scarce |
| Risk of an update breaking production | Low | Very low | High |
| Best fit | Typical web project | Long-lived server, minimal churn | Staging, experiments |
A note on control panels: prebuilt panel images save time on day one but take over your nginx configuration and firewall rules. If you are reading this checklist, you most likely want a clean image. The trade-offs between hosting tiers are covered in shared hosting vs VPS vs dedicated server.
Step 1. Verify what you were actually given
Before installing software, confirm the hardware matches the plan and that you are not on an oversold node with a core shared ten ways. Three minutes of commands can save a day of support tickets.
# virtualization type: kvm is a full VM, lxc/openvz is a container
systemd-detect-virt

# CPU: core count, model, flags
lscpu | head -20

# memory and swap (most VPS images ship without swap)
free -h

# disks, partitions, free space
lsblk
df -hT

# network interfaces and addresses
ip -br address

# kernel and distribution
uname -r
cat /etc/os-release
What to look for:
- Container virtualization (lxc, openvz) shares the host kernel. You cannot load kernel modules, own swap is frequently unavailable, some sysctl keys are read-only, and certain Docker or nftables features will not work. Usually fine for a website, a blocker for anything unusual.
- Disk backend. A local NVMe virtio disk has a very different latency profile from a network volume. Quick sanity check:
dd if=/dev/zero of=/tmp/t bs=1M count=1024 conv=fdatasync, then delete the file. - CPU flags. The presence of
aesmaterially affects TLS handshake throughput; its absence is worth a question to support.
Most providers publish the virtualization type and storage class on the plan page — compare the command output against the specification, not against your expectations.
Step 2. First login, a dedicated user and sudo
The first connection is almost always as root, either with the emailed password or with a key injected at creation time. Living as root is unnecessary: every typo executes without confirmation, and logs cannot tell you who did what.
# first connection (default port 22)
ssh root@203.0.113.10

# 1. create the user: makes /home/deploy and asks for a password
adduser deploy

# 2. grant administrative rights
#    Debian/Ubuntu use the sudo group, RHEL/AlmaLinux/Rocky use wheel
usermod -aG sudo deploy

# 3. copy root's authorized keys into the new profile
rsync --archive --chown=deploy:deploy /root/.ssh /home/deploy/

# 4. permissions must be strict or sshd will ignore the keys
chmod 700 /home/deploy/.ssh
chmod 600 /home/deploy/.ssh/authorized_keys

# 5. VERIFY from a second terminal, keep the current session open
ssh -t deploy@203.0.113.10 'id; sudo true && echo sudo-ok'

# 6. only after a successful check, lock the root password
passwd -l root
Never close your current SSH session until the new access has been verified in a separate window. That is the only protection against "passwords disabled, key rejected, no console available".
SSH keys and disabling password authentication
Passwords can be guessed; keys cannot. Put the hardening directives in a drop-in file rather than the main config, so a package upgrade never overwrites your edits:
# /etc/ssh/sshd_config.d/10-hardening.conf
PermitRootLogin prohibit-password
PasswordAuthentication no
KbdInteractiveAuthentication no
PubkeyAuthentication yes
PermitEmptyPasswords no
MaxAuthTries 3
LoginGraceTime 30

# validate the syntax BEFORE applying, or sshd will fail to start
sshd -t

# reload without dropping existing sessions
systemctl reload ssh
Key generation, ed25519 versus RSA, ssh-agent, multiple keys and debugging "Permission denied (publickey)" are covered separately in SSH key authentication setup. Every directive is documented in the official sshd_config(5) manual.
Moving SSH off port 22 is not security, but it does cut log noise from mass scanners dramatically. If you change it, add the firewall rule first, edit sshd second, and update the ufw profile accordingly.
Step 3. Firewall: close the perimeter before installing anything
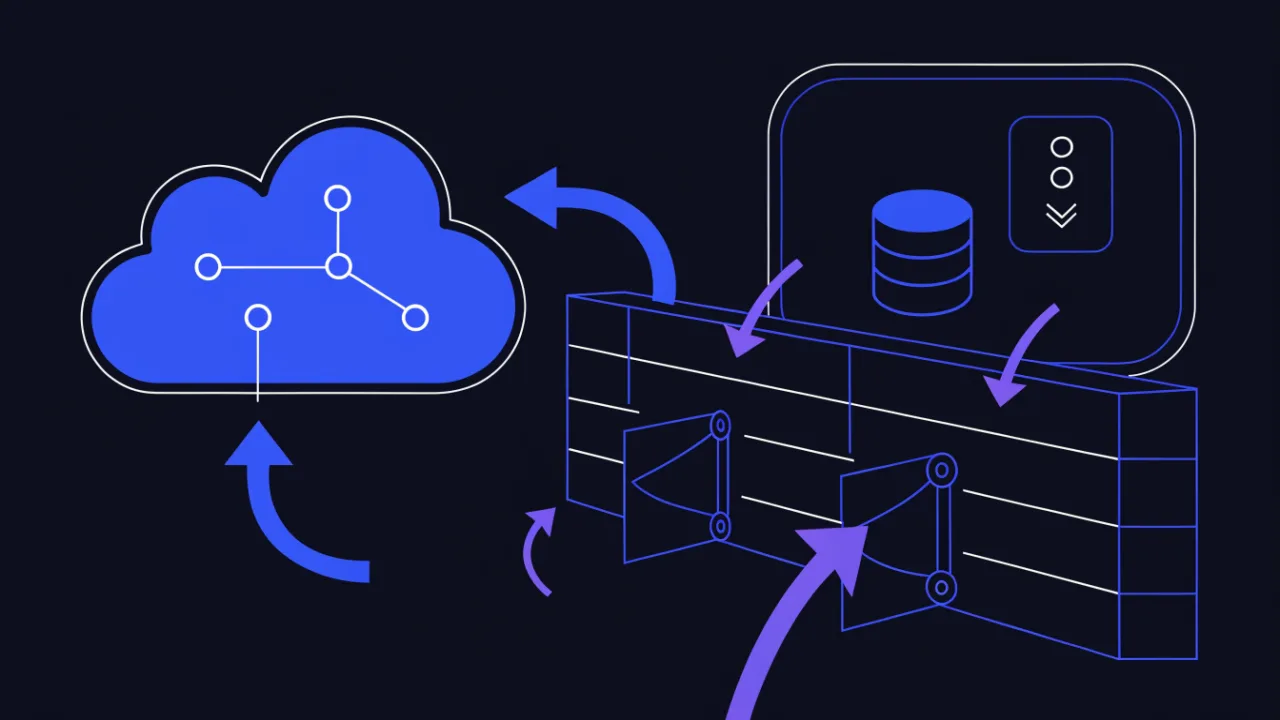
On a clean system the firewall is usually empty: everything bound to 0.0.0.0 is reachable from the internet. While no services exist yet is exactly the right moment to set a default-deny policy.
# default policy
ufw default deny incoming
ufw default allow outgoing

# allow only what is needed
ufw allow OpenSSH        # profile = 22/tcp; for another port: ufw allow 2222/tcp
ufw allow 80/tcp         # HTTP: needed for redirects and certificate issuance
ufw allow 443/tcp        # HTTPS

# lockout insurance: reset the rules automatically in 10 minutes
systemd-run --unit=ufw-rollback --on-active=10min /usr/sbin/ufw --force reset

ufw enable               # asks for confirmation, warns about SSH disruption
ufw status verbose

# connection alive and rules correct, cancel the insurance
systemctl stop ufw-rollback.timer
The order is mandatory:ufw allow OpenSSHfirst,ufw enablesecond. Reversing it is the single most common way to lock yourself out of a new server.
Databases, Redis, admin panels and metrics endpoints do not belong on a public interface: bind them to 127.0.0.1 or a private network. If remote access is genuinely required, tunnel it over SSH or use the provider's private network instead of opening 3306 to the world. What happens when a port is left open is covered in open ports and their risks.
fail2ban in one command
Even with passwords disabled, brute-force traffic keeps knocking and filling your journals. fail2ban reads logs and bans sources through the firewall:
apt install -y fail2ban
printf '[sshd]\nenabled = true\nmaxretry = 3\nbantime = 1h\nfindtime = 10m\n' > /etc/fail2ban/jail.d/sshd.local
systemctl restart fail2ban
fail2ban-client status sshd
Backends for the systemd journal, false positives, custom nginx filters and office IP allowlists are detailed in the full fail2ban setup guide.
Step 4. Updates and automatic security patches
VPS images are built in advance and are typically weeks behind by the time you get one. Right after closing the perimeter, bring the system current:
apt update
apt full-upgrade -y
apt autoremove --purge -y

# is a reboot required (appears after kernel or libc updates)
[ -f /var/run/reboot-required ] && cat /var/run/reboot-required.pkgs
Then enable unattended installation of security updates specifically. Fully automatic upgrades of every package on a web server are risky — a major PHP or nginx version could land overnight. The security pocket is far safer and closes the bulk of published CVEs.
apt install -y unattended-upgrades apt-listchanges

# enables the periodic jobs and writes 20auto-upgrades
dpkg-reconfigure --priority=low unattended-upgrades

# key settings in /etc/apt/apt.conf.d/50unattended-upgrades:
#   Unattended-Upgrade::Allowed-Origins - keep the security origin only
#   Unattended-Upgrade::Mail "admin@example.com";
#   Unattended-Upgrade::Remove-Unused-Kernel-Packages "true";
#   Unattended-Upgrade::Automatic-Reboot "false";
#   Unattended-Upgrade::Automatic-Reboot-Time "04:00";

# dry run: shows exactly what would be installed right now
unattended-upgrade --dry-run --debug

# confirm the timers are active and when they fire
systemctl list-timers apt-daily.timer apt-daily-upgrade.timer
A kernel update is not applied until you reboot — until then you are running the vulnerable kernel with the patch merely installed. Make a habit of checking /var/run/reboot-required and rebooting in an agreed window. Parameter reference lives in the Debian documentation.
Step 5. Hostname, timezone and NTP
The hostname shows up in logs, outgoing mail and monitoring alerts. Set it once, in FQDN form:
hostnamectl set-hostname web01.example.com

# /etc/hosts should carry both the short and the fully qualified name
# 127.0.1.1   web01.example.com web01
hostname -f
Time is an underrated source of outages. Clock skew breaks TLS certificate validity checks, TOTP two-factor codes and signed API requests to cloud providers, and it turns your journals into useless noise during an incident review.
# timezone: UTC is easier on servers, local time is easier in reports
timedatectl set-timezone UTC

# synchronization status
timedatectl status

# for systemd-timesyncd
systemctl enable --now systemd-timesyncd
timedatectl show-timesync --all | head

# if chrony is in use
chronyc tracking
chronyc sources -v
A skew of only a few minutes produces "certificate is not yet valid" errors for some clients and breaks two-factor logins. Verify synchronization immediately, not when users start complaining.
Step 6. Swap, limits and unnecessary services
A swap file on a low-memory VPS
On plans with 1-2 GB of RAM, swap is not "slow memory" — it is a shock absorber. Without it, a traffic spike makes the kernel invoke the OOM killer, and the victim is usually the fattest process: the database or PHP-FPM. With swap, the same spike costs you latency instead of an outage.
# is swap already present?
swapon --show
free -h

# create the file (fallocate is fine on ext4; use dd on XFS/btrfs)
fallocate -l 2G /swapfile || dd if=/dev/zero of=/swapfile bs=1M count=2048 status=progress
chmod 600 /swapfile
mkswap /swapfile
swapon /swapfile

# persist across reboots
echo '/swapfile none swap sw 0 0' >> /etc/fstab

# make the kernel less eager to swap out
printf 'vm.swappiness=10\nvm.vfs_cache_pressure=50\n' > /etc/sysctl.d/99-swap.conf
sysctl --system

# verify
swapon --show
cat /proc/sys/vm/swappiness
Sizing rule of thumb: with 1-2 GB of RAM use roughly the size of memory, with 4-8 GB use half, beyond that 4 GB is almost always enough. On btrfs the file needs special preparation (no copy-on-write), and under container virtualization your own swap may be unavailable — there the only lever is tuning application memory limits.
Open file limits
Default descriptor limits are easy to exhaust with nginx plus PHP-FPM plus a database under load. The symptom is "too many open files" in the logs while CPU and memory look idle.
# current value for the shell user
ulimit -n

# for user sessions: /etc/security/limits.d/90-nofile.conf
# *  soft  nofile  65535
# *  hard  nofile  65535

# systemd services do NOT read limits.conf; the unit wins,
# so change it through an override
systemctl edit nginx
#   [Service]
#   LimitNOFILE=65535

systemctl show nginx -p LimitNOFILE
What is listening
Images often ship extras: a mail daemon, rpcbind, debugging helpers. Every listening socket is attack surface.
# who listens, and which process owns it
ss -tulpn

# running services
systemctl list-units --type=service --state=running

# disable and remove what you do not need (example)
systemctl disable --now rpcbind.socket rpcbind
apt purge -y rpcbind

# journals must not eat the disk
journalctl --disk-usage
journalctl --vacuum-time=14d
# permanent cap: SystemMaxUse=500M in /etc/systemd/journald.conf
Step 7. Web stack, TLS, backups and monitoring — in that order
With the base in place, the server is ready for the project. Installation order matters, because each layer depends on the previous one.
- Web server. nginx at the front: TLS termination, static files, rate limits, proxying. A from-scratch configuration walkthrough is in the nginx configuration guide; the security side is in web server hardening.
- Application. PHP-FPM, Node.js or Python workers run as their own user, over a loopback socket, without write access to the code directory wherever that is feasible.
- Database. Bound to the local interface, one dedicated account per application, credentials outside the repository.
- TLS. Issue the certificate before production traffic, together with automatic renewal and an HTTP redirect. Step by step in free Let's Encrypt certificate setup.
- Backups. Configured BEFORE the first deploy. Schedule, restore testing and off-server copies are in the website backup guide.
- Monitoring. Turned on launch day: availability, certificate expiry, response time.
A backup you have never restored is not a backup. Test the restore on this same clean server while it holds no production data — you will never get a more convenient moment.
The full checklist: step, command, purpose, verification
| Step | Command or file | Purpose | How to confirm it applied |
|---|---|---|---|
| Resources and virtualization | lscpu, free -h, df -hT, systemd-detect-virt | Match the plan, know container limits | Output matches the plan specification |
| Sudo user | adduser, usermod -aG sudo | Stop working as root | ssh -t deploy@host 'sudo true' succeeds |
| SSH keys | /home/deploy/.ssh/authorized_keys | Brute-force-resistant login | Login with no password prompt from a new window |
| Password login off | /etc/ssh/sshd_config.d/10-hardening.conf | Removes an entire attack class | sshd -t clean; password login refused |
| Root password | passwd -l root | Root cannot authenticate by password | passwd -S root reports status L |
| Firewall | ufw allow OpenSSH, ufw enable | Only intended ports exposed | ufw status verbose plus an external scan |
| fail2ban | /etc/fail2ban/jail.d/sshd.local | Automatic bans for brute force | fail2ban-client status sshd |
| Updates | apt full-upgrade | Closes known vulnerabilities | apt list --upgradable is empty |
| Auto patching | unattended-upgrades | Security fixes land without a human | unattended-upgrade --dry-run --debug |
| Hostname | hostnamectl, /etc/hosts | Meaningful logs and mail headers | hostname -f returns the FQDN |
| Time | timedatectl, chrony | Valid TLS, working TOTP, usable logs | timedatectl status: synchronized = yes |
| Swap | /swapfile, /etc/fstab | OOM protection on small plans | swapon --show after a reboot |
| Limits | limits.d, LimitNOFILE | No "too many open files" errors | systemctl show nginx -p LimitNOFILE |
| Extra services | ss -tulpn, apt purge | Minimal attack surface | Only expected sockets in the output |
| Journals | journald.conf, logrotate | Disk is not filled by logs | journalctl --disk-usage within the cap |
| TLS and backups | ACME client, backup job | HTTPS and recoverability from day one | A test restore actually completed |
How to verify the setup from the outside
Local commands show intent; an external check shows reality. Reboot the server once, then run it through the outside contour:
- What is really exposed. Scan the host from an external network with the open port scanner. Expected result: 22 (or your SSH port), 80, 443 — and nothing else.
- Certificate and chain. Chain completeness, expiry and protocol support via the SSL checker. A missing intermediate is the most common defect: browsers stay silent, mobile clients and curl do not.
- Security headers. HSTS, X-Content-Type-Options, frame policy — the security audit plus a line-by-line view in the HTTP header analyzer.
- Response time. The TTFB of a clean server is the baseline you will later compare degradation against: website speed test.
- Ongoing observation. Uptime monitoring with downtime and certificate-expiry alerts belongs on launch day, not after the first incident.

Common first-hour mistakes
- Enabling ufw before allowing SSH. A classic. Only the provider console saves you.
- Disabling passwords without testing the key. Always test from a second window before closing the first.
- Leaving the database on 0.0.0.0. Even with a password this is an invitation: bots hammer MySQL and Redis credentials around the clock.
- Skipping the reboot after a kernel update. The patch is installed but not in effect.
- Setting up backups "after launch". The very first migration mistake lands in the window with no copies.
- Storing backups on the same disk. One volume failure destroys the data and the copies together.
- Installing a control panel over hand-written configs. The panel will rewrite nginx and firewall rules, quietly.
Frequently asked questions
How long does initial VPS setup really take?
Steps 0-6 of this checklist take 20-40 minutes if your SSH key is ready. Installing the web stack, issuing a certificate and configuring backups adds another one to two hours. If you do this regularly, wrap the steps in a script or an Ansible role and it collapses to minutes.
Do I need swap if I have enough RAM?
Yes — a small file helps even with headroom, because it lets the kernel evict unused pages and absorb short spikes without the OOM killer. The exception is workloads with hard latency requirements where any eviction is unacceptable.
Should I move SSH off port 22?
It is noise reduction, not security: mass scanners hit 22, so a non-standard port keeps logs readable. It will not stop a targeted attacker. Real protection comes from keys only, plus fail2ban, plus a default-deny firewall.
Root or sudo — does it matter on a single-admin server?
Yes. A separate account gives you auditable actions, protection from accidental destructive commands, and the ability to revoke one person's access without rotating a shared password. It also lets you keep PermitRootLogin prohibit-password and drop an entire category of login attempts.
Can I install a control panel after manual setup?
Technically yes, practically it is a conflict generator: panels rewrite web server configuration, firewall rules and cron jobs to match their own model. Pick one approach — a panel from the start on a clean system, or manual control throughout.
How do I know the server is correctly configured rather than merely working?
By external evidence: a scan shows only expected ports, the certificate is valid with a complete chain, security headers are present, monitoring sees the host, and a restore from backup has actually been performed. Everything else is an assumption.
Pre-deploy checklist
- An LTS distribution is chosen and its version is recorded in project documentation.
- Resources, virtualization type and free disk space have been verified.
- A sudo user exists and key-based login was tested in a separate session.
- Password authentication is off, the root password is locked,
sshd -tis clean. - The firewall is enabled with deny-incoming policy; only SSH, 80 and 443 are open.
- fail2ban runs with an active SSH jail.
- The system is fully updated and unattended-upgrades installs security patches.
- Hostname is set as an FQDN, timezone chosen, time synchronization confirmed.
- Swap and swappiness are configured; descriptor limits raised for services.
- Unnecessary services are removed;
ss -tulpnholds no surprises. - Journal size is capped and logrotate is working.
- The web stack is installed, a certificate issued, HTTP redirects to HTTPS.
- Backups are configured and restored once before any production data lands.
- Uptime and certificate-expiry monitoring is connected.
- External checks of ports, TLS, headers and speed passed after a reboot.